
How It Works
Live in under 5 minutes.
Most of the setup is automated. CreditGuard handles the configuration — you only need to add one checkout block manually.
Install from the Shopify App Store
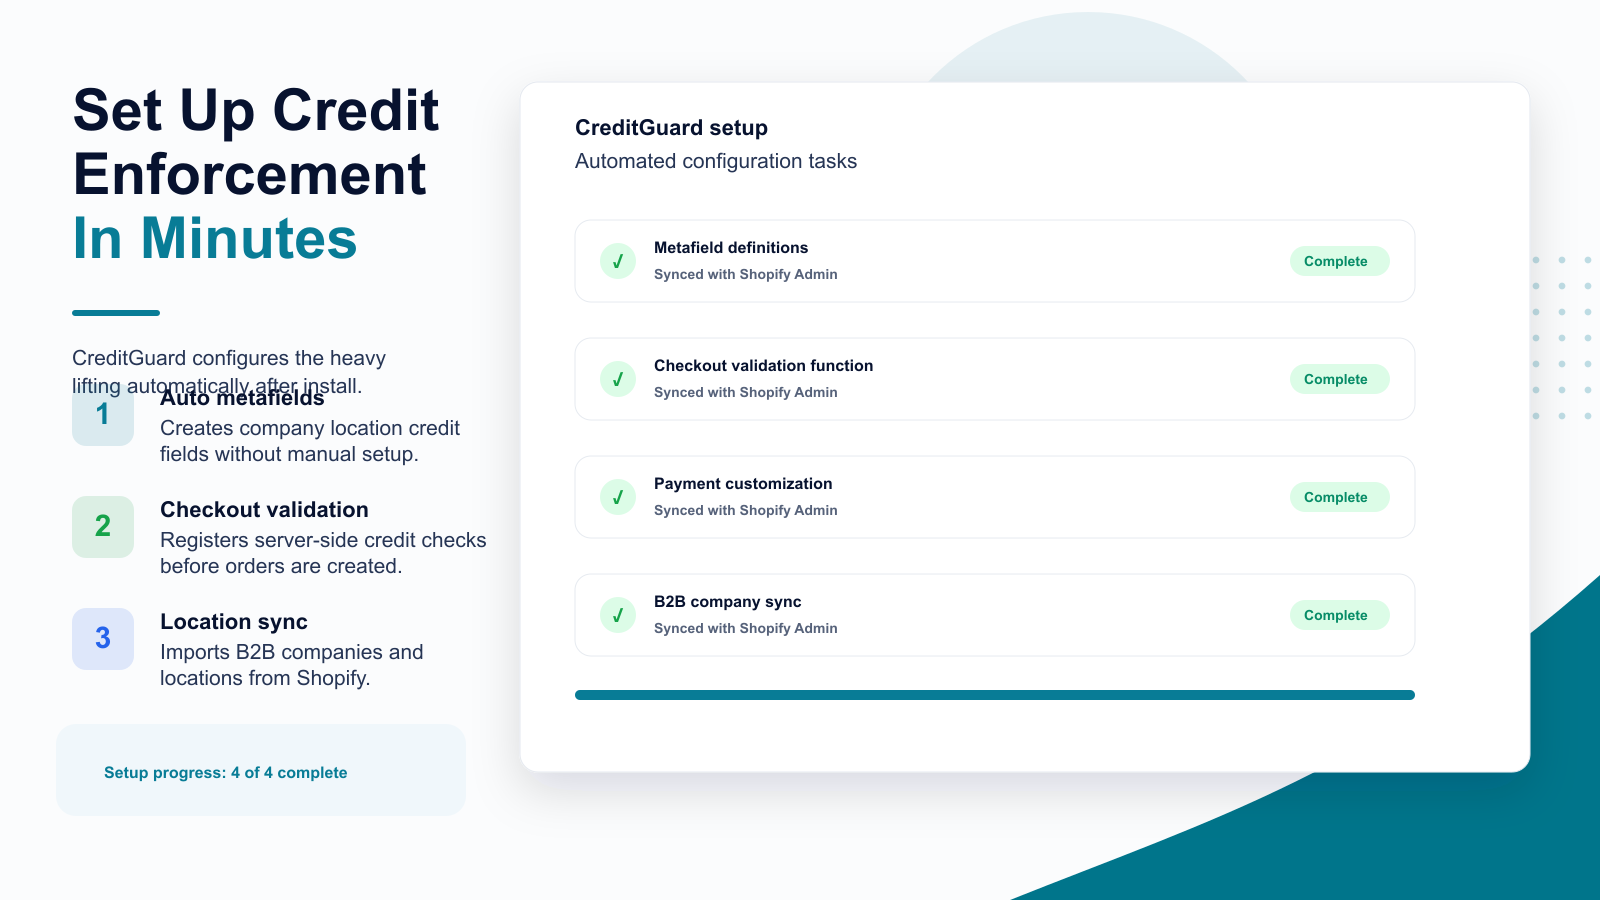
Click install. CreditGuard immediately begins four automated setup tasks in parallel:
- Creates the credit_management.credit_limit metafield definition on company locations
- Registers a payment customisation that hides 'Pay on Account' for suspended or over-limit accounts
- Registers the checkout cart validation with blockOnFailure enabled
- Syncs all your existing B2B companies and locations into CreditGuard
Add the checkout block
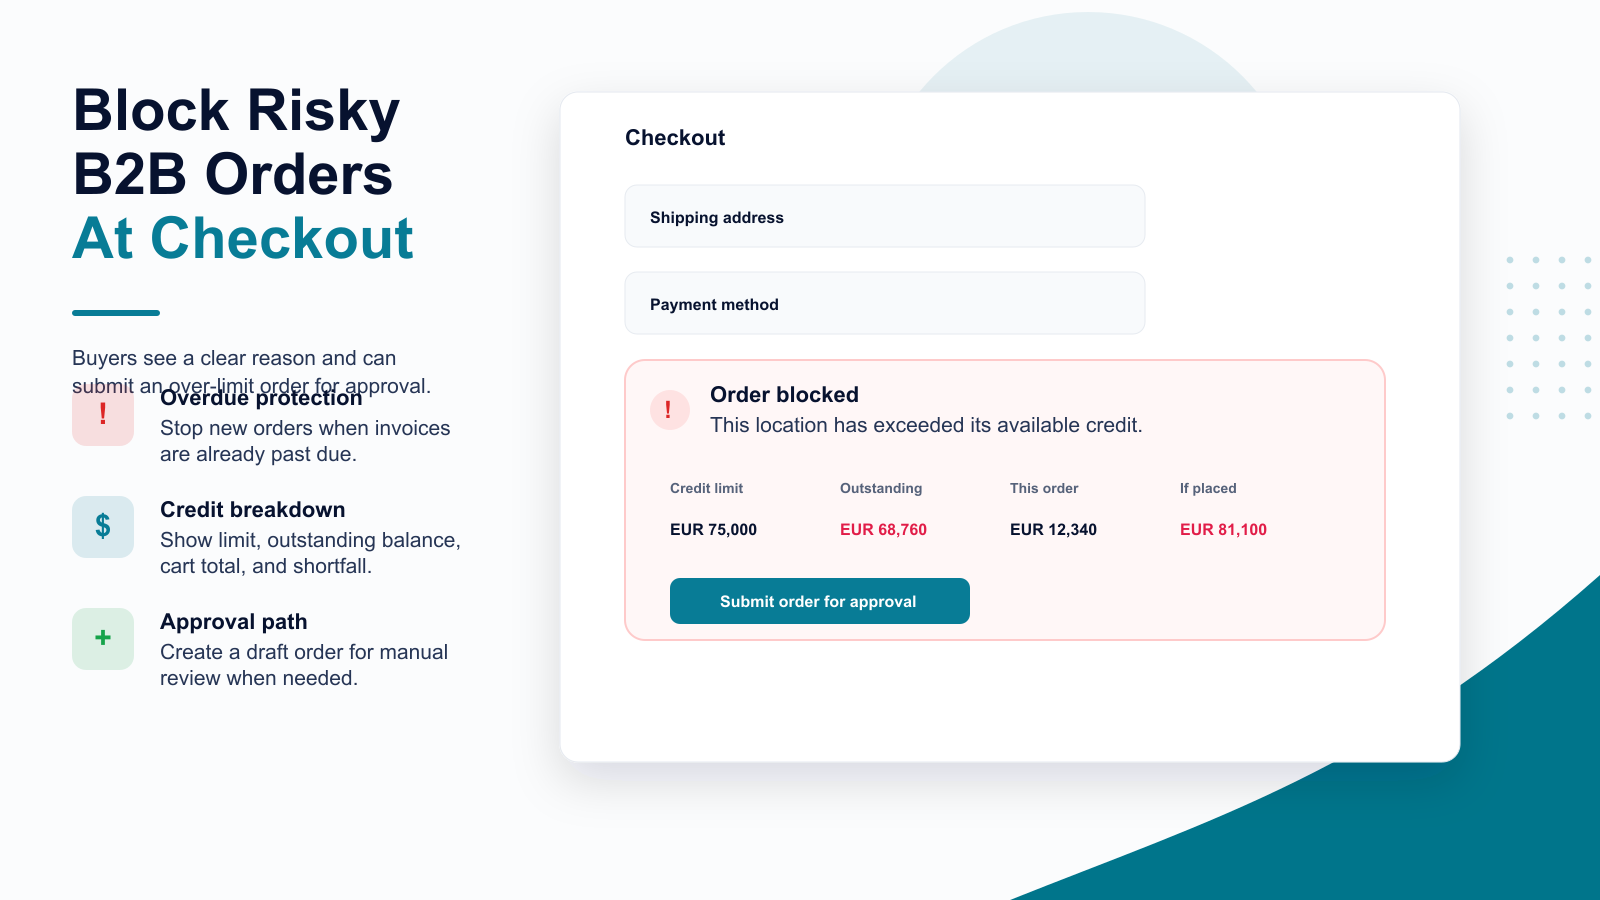
After setup, CreditGuard shows you step-by-step instructions with screenshots to add the CreditGuard block in the Shopify checkout editor. This block shows buyers their credit status and the 'submit for approval' button when needed.
Pre-install sync runs automatically
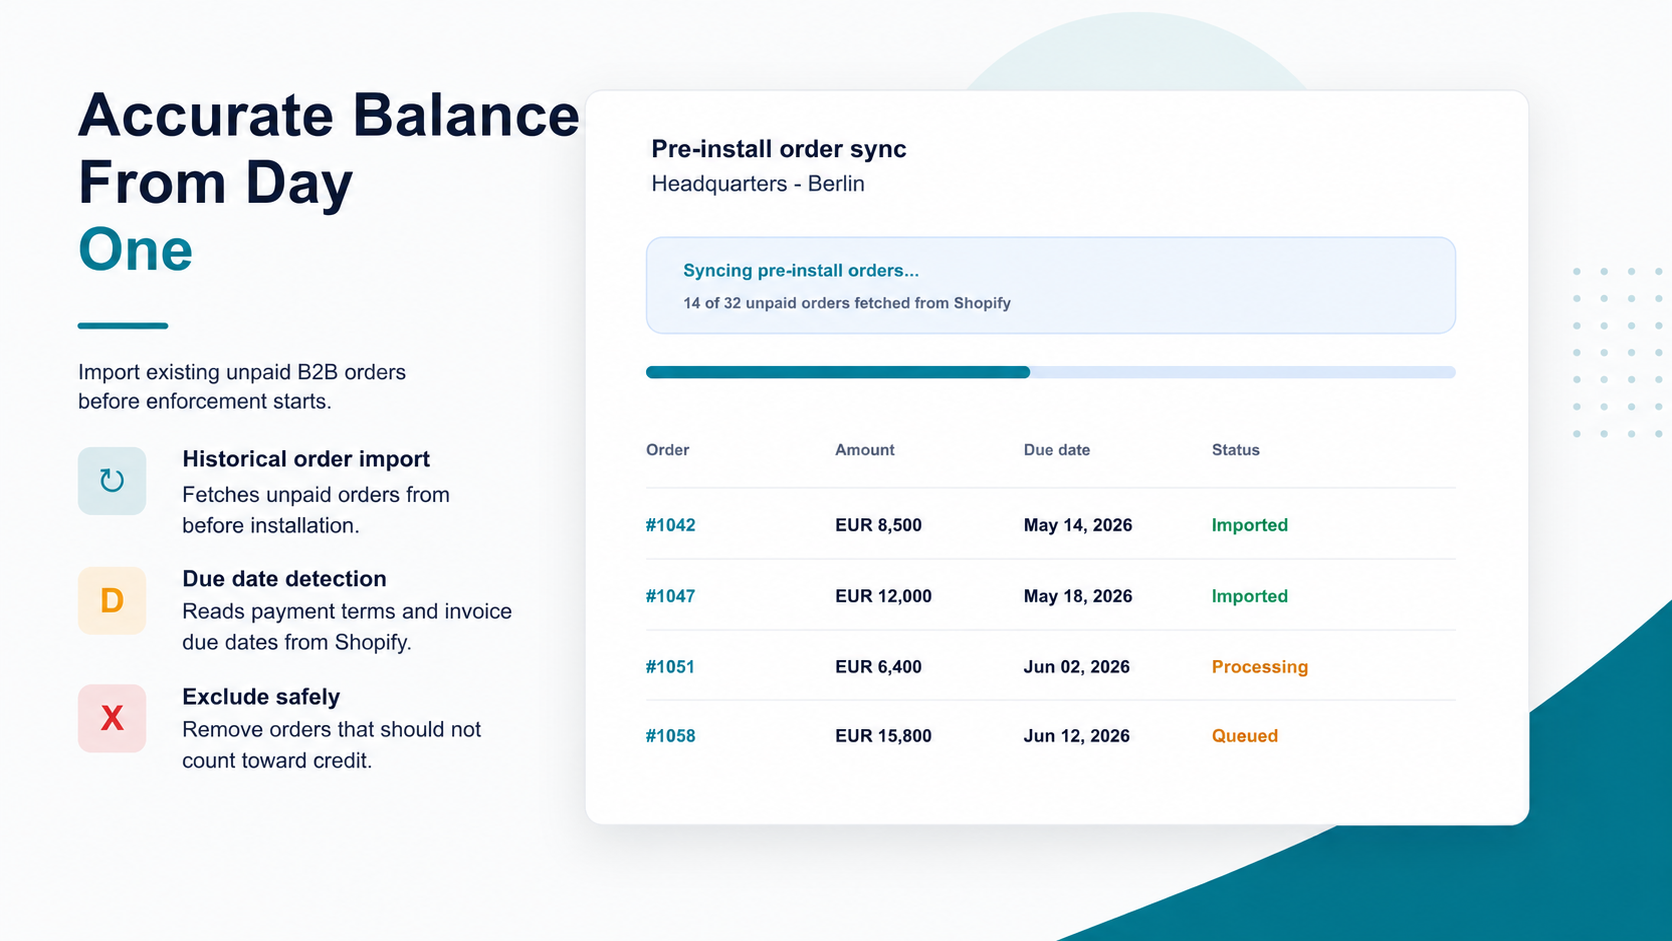
The first time you open any location page, CreditGuard fetches all unpaid orders that existed before you installed the app and imports them into the credit balance automatically. A live progress banner keeps you informed.
Set your first credit limit
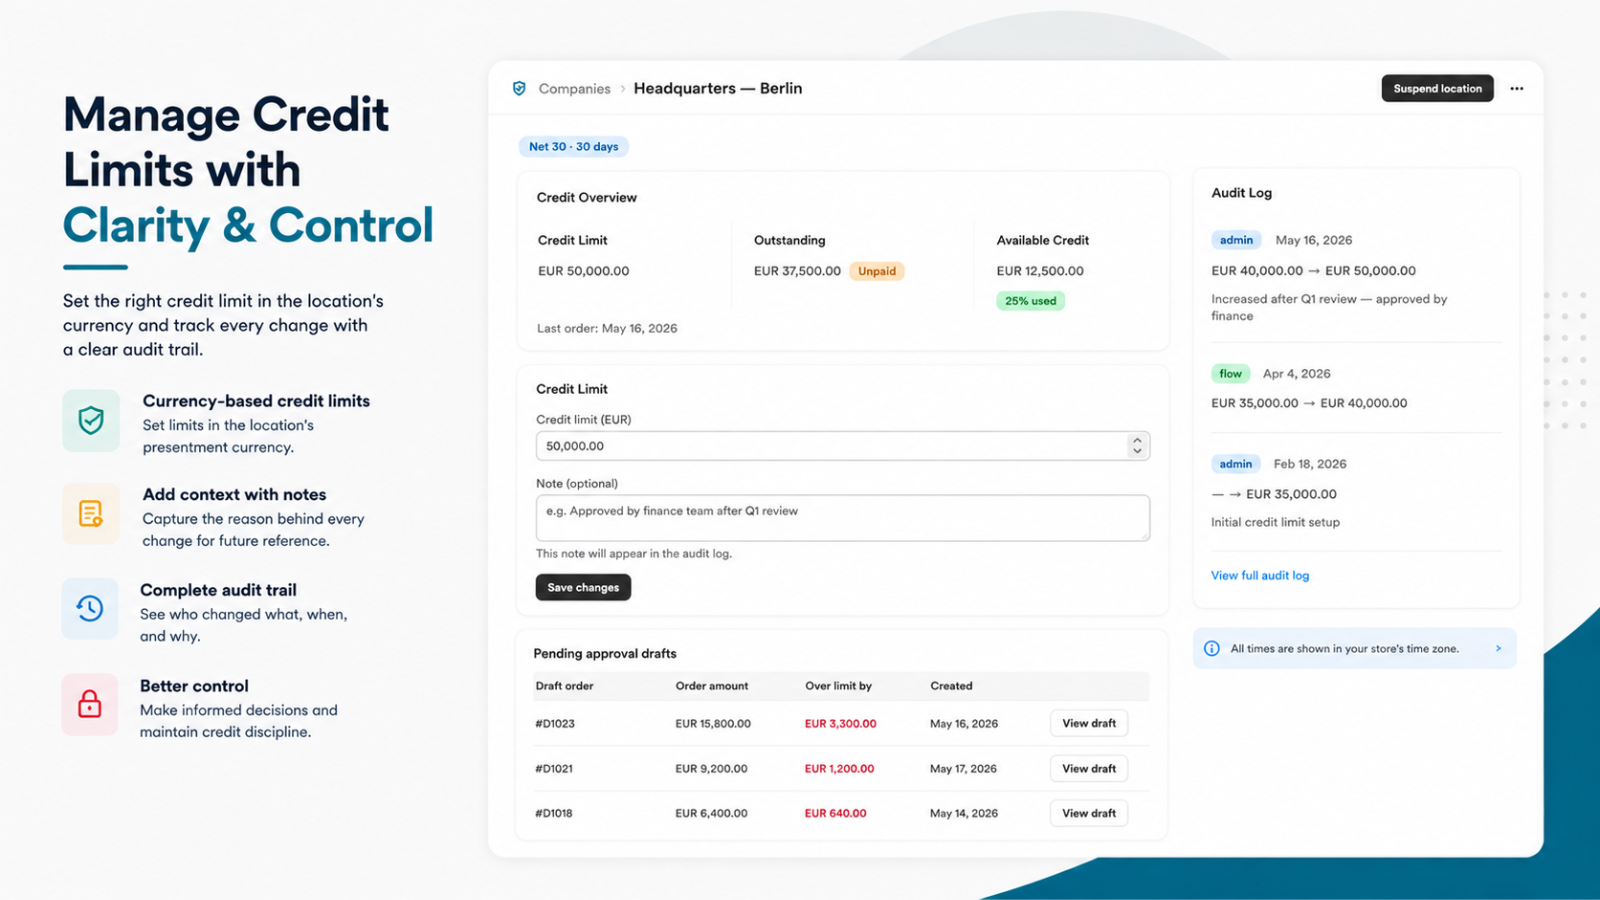
Open any company, navigate to a location, enter a credit limit, and save. That location is now enforced. The limit syncs instantly to Shopify metafields — no delay.
Order Lifecycle
How every B2B order interacts with CreditGuard.
Every checkout runs through the same validation function. Here's what happens on each path.
Buyer Experience
What your buyers see when blocked.
Every block reason shows a distinct, clear message. Buyers are never left confused about why their order was stopped.
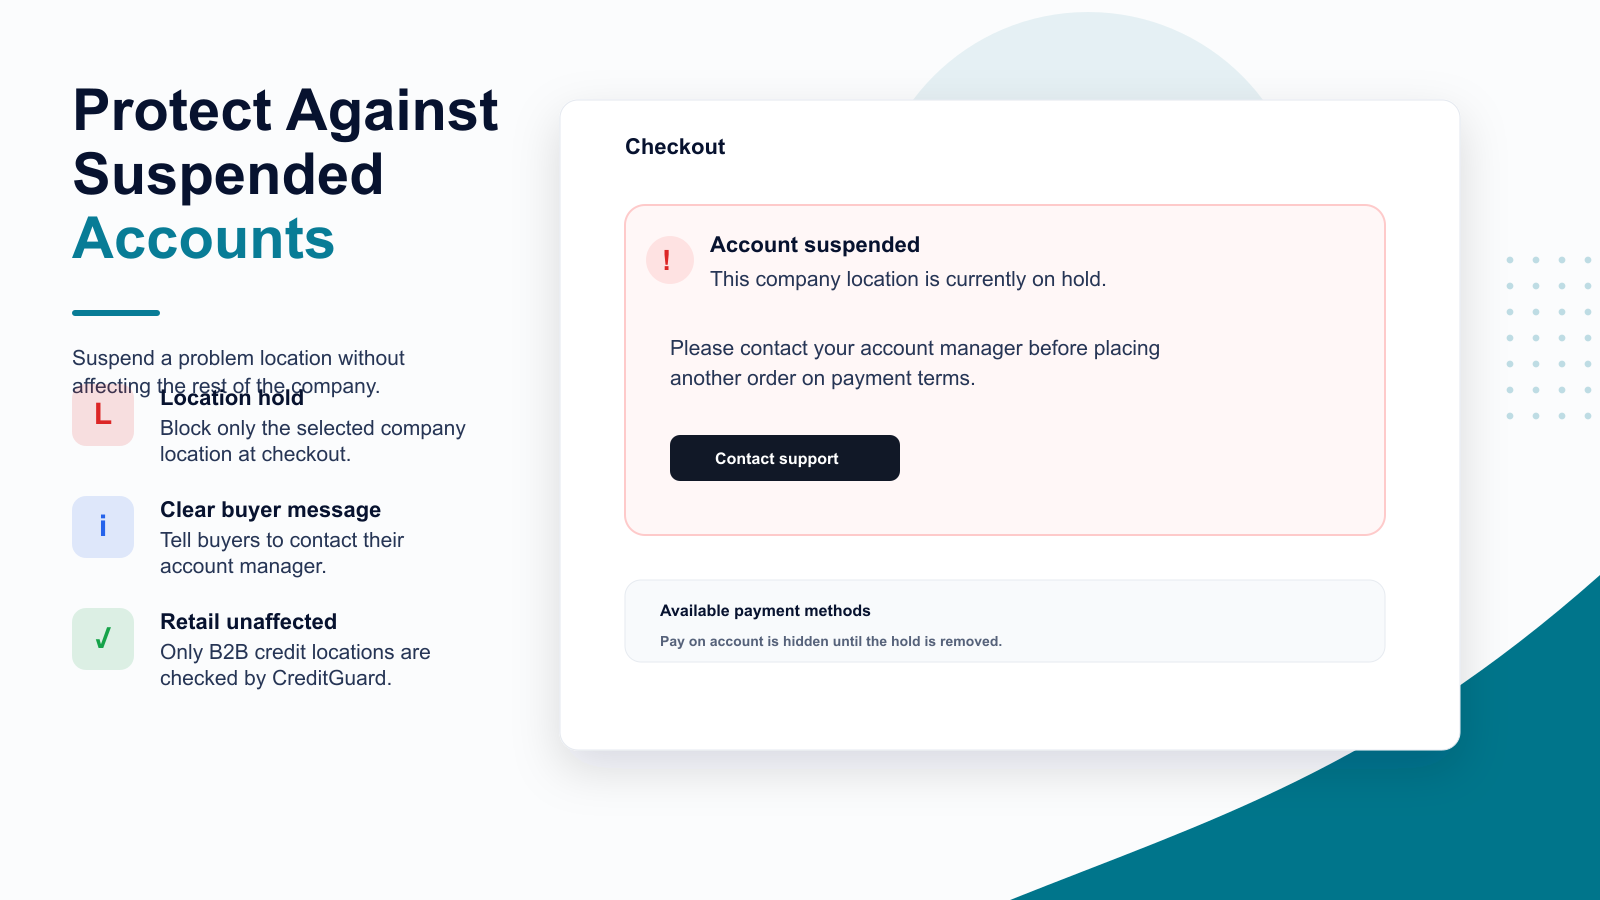
"This account has been suspended. Please contact your account manager."
"This location has overdue invoices. Please settle outstanding invoices before placing new orders."
"Shows cart total, outstanding balance, and combined total vs. credit limit. 'Submit order for approval' button available."
Ready to go live?
Install CreditGuard and have your first credit limit enforced in under 5 minutes.